

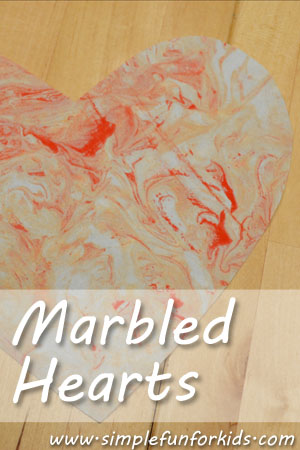
Marbled Hearts
(E was 26 months old.)
You’ll need:
- Shaving cream.
- Food coloring or other washable paint.
- Heavy paper or cardstock.
- Popsicle stick.
- Tray.
How to make prints with shaving cream:
- Spray shaving cream on a tray or similar surface.
- Add food coloring or paint, gently mix it into the shaving cream to make a “swirly” pattern.
- Lay a sheet of paper or cardstock on top of the shaving cream.
- Press lightly down before removing the paper.
- Remove shaving cream by scraping with a popsicle stick or similar, allow paper to dry.
- Cut into hearts, cards, or other shapes.
How it worked for us:
We got three activities out of a simple craft idea, so I was very pleased.
First, of course, we worked on our Marbled Hearts as planned.
Everyone I’ve seen write about this said to use food coloring on the shaving cream. I’m a bit protective of the food coloring we have, as it’s really not that easy or cheap to come by in Germany, so I figured, why not use tempera paint instead?
It’s washable, and E isn’t likely to eat shaving cream, so non-edible paint should be fine.
I think it worked out pretty much the same as food coloring with less paint used. It did look a bit scary at first when E ended up rubbing shaving cream on her chest, her cheek and the table because the red paint was really intense. But it washed right off as expected, even on her skin.

When all our sheets of paper had been covered with shaving cream (a job for E),

scraped off again (a job for me) and left to dry, we turned the activity into a colored shaving cream sensory experience with the help of some extra tools.
E especially enjoyed the feeling of shaving cream on her skin and also rubbed a fair amount into the table. When we were cleaning up, she made a point of pointing out all the crevices of the table that had turned red and needed cleaning 😉

The clean-up turned into part 3, a bath activity. I simply placed child, tray and tools into the bathtub with some bubble bath and let the clean-up take care of itself 🙂 {I still had to clean off the table the old-fashioned way 😉 }

When our marbled paper had dried, I cut most sheets into hearts with the help of two simple paper stencils that I’d cut freehand out of regular sheets of paper.
I placed them on the backside of the paper and adjusted them to catch as many “pretty” areas as possible by holding it up to the light. That didn’t work for the black paper or the card stock, so I just placed the stencils on the front and estimated the best areas.
Two rectangles of card stock were left over for Valentine’s Day cards for the grandparents to be decorated some other time (maybe with E’s Glitter Hearts v2?).

What I learned:
- Tempera paint works just fine for this if you don’t have/want to use food coloring.
- Make sure the paint doesn’t get mixed into the shaving cream completely. You want to be able to see the swirls in the shaving cream to get the marbled effect.
- This also means that you can’t do many sheets one after the other. Every time you push down on them, the swirls are pushed away. After a while, you may need to add more shaving cream and paint.
- Heavier paper works best. The thinner the paper, the faster you need to scrape off the shaving cream to avoid warping.
- Since I didn’t have a popsicle stick or similar, I used a pencil to scrape off the shaving cream. This technique left finger marks in the paint (most visible in the black heart above), since I couldn’t get a good grip while keeping my fingers away from the paper. I switched to an emergency scraper, namely the side of my small cutting mat, to keep my fingers away from the surface of the paper. I strongly suggest spending some more time finding a suitable scraper ahead of time than I did 😉
- The shaving cream left a slight whitish residue in addition to the marbled effect of the red paint on the black paper which added a nice effect, I thought.
Additional suggestions:
You can certainly cut hearts from plain paper/card stock before you marble them.
I’d still suggest doing it the other way around, as I didn’t find it very easy to aim the sheets perfectly and get them completely covered while not getting the swirls of paint messed up.
With my technique above, you can simply choose the best areas for your hearts. {And of course you can do this for other shapes and other holidays as well.}
Inspiration:
I first saw this idea as a Christmas craft on Growing a Jeweled Rose.
We didn’t do it for Christmas, and Valentine’s Day was up next, so Marbled Hearts it was 😉 And for Easter, we made Marbled Eggs.
Have you used the shaving cream marbling technique? How did you like it? Leave a comment below and tell me all about it!
If you liked this post, come follow me on Pinterest to keep up to date with all we do, and for lots of great ideas from others! Or like and drop me a line on my Facebook page, where I share my own posts and those of others every day!