

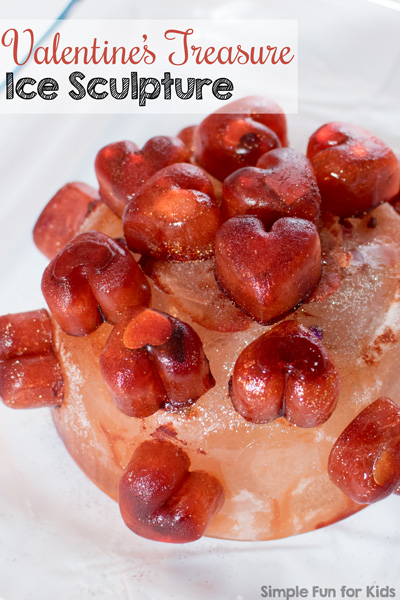
Valentine’s Treasure Ice Sculpture
I’d been wanting to do to an ice excavation activity with salt for a while {I really wanted to see how well it worked, as I’d actually never tried it myself, not even when I was a kid…} but never quite got around to actually doing the freezing. Yesterday, I came across our ice cube hearts tray, and inspiration struck! I decided to give the activity a Valentine’s spin and send E on a Valentine’s treasure hunt!
(E was 4 years and 2 months old.)
This post contains affiliate links for your convenience.
Materials for a Valentine’s Treasure Ice Sculpture:
- Water.
- Red liquid watercolors, food coloring or Kool Aid.
- Non-red liquid watercolors or food coloring (optional).
- Heart-shaped ice cube tray. {We bought ours at IKEA years ago, looks like it’s not available anymore. There’s a selection at Amazon but I can’t vouch for any of them, in particular in regards to size.}
- Bowl for the base of the ice sculpture (optional).
- Glitter (optional).
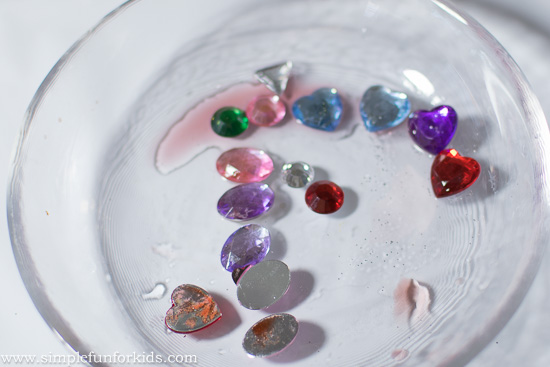
- Assorted small treasures. {I used flat plastic gems but you could use literally anything that fits into your ice cube mold and can withstand being frozen.}
- Eye dropper (optional).
- Small bowls for room temperature water and liquid watercolors.
- Baking dish or sensory bin to contain the mess.
I decided to use some Kool Aid that I found in the back of the pantry for this. We really hadn’t used Kool Aid in a while, since liquid watercolors just tend to be more convenient. I didn’t really remember the drawback of Kool Aid – but I was reminded pretty quickly: It turns fingers red. Bright red. And it doesn’t always wash off completely right away – it took a few hours for it to disappear from our hands. Not really a big deal to us, and it did smell great, you just have to weigh the pros and cons for yourself 😉
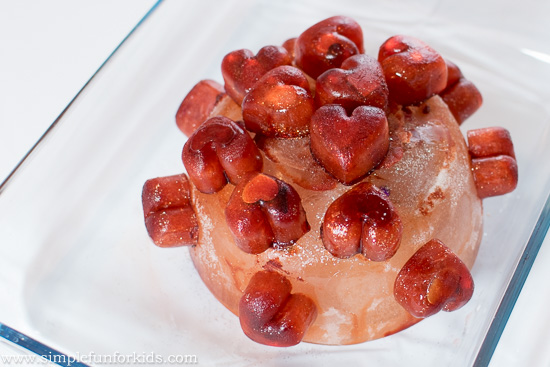
I placed a few gems in each of the cavities of the ice cube mold, then mixed the Kool Aid with just enough water to fill the ice cube tray – it was much less than you’d use if you wanted to drink the Kool Aid, which contributed to a deeper red for both the hearts and our fingers 😉 Then I added a bit of silver glitter, stirred well, and poured the mixture into the tray.
After I’d placed the ice cube tray into the freezer, I started wondering how long it might take for the hearts to melt. Since I’d never done an ice melting experiment before, I was worried that the hearts would melt too quickly. I decided to put the little bit of Kool Aid/water/glitter mix that was left into a small plastic bowl along with a few more gems and top it off with plain water, then placed the bowl into the freezer as well.
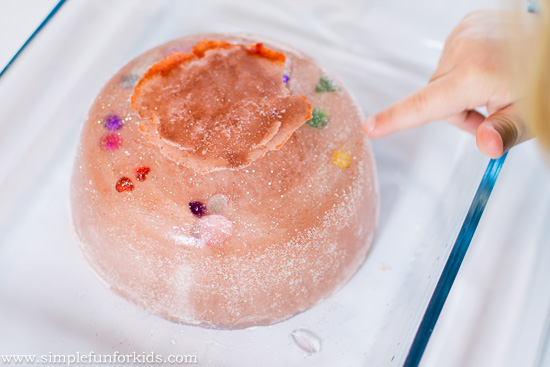
The next day, I pulled the bowl and ice cube tray out of the freezer, and out of nowhere, E appeared 😉 She was intrigued immediately, even before she noticed the treasure. {The water in the bowl had actually expanded a bit while freezing, making the top and bottom uneven but it didn’t make a difference. The ice had also pulled away from the sides of the bowl, so it was super easy to remove.}
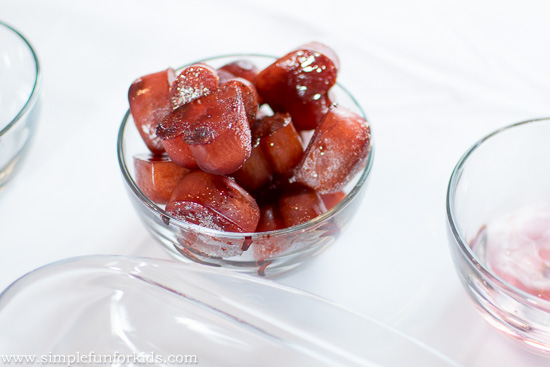
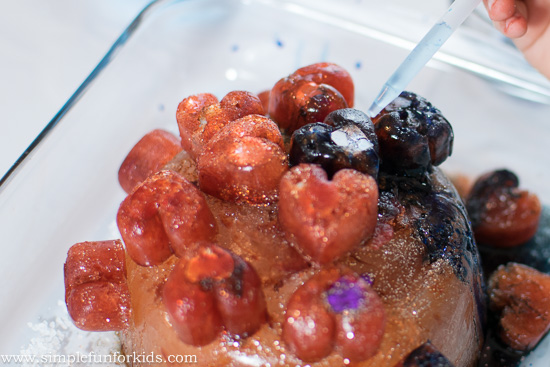
I’d been planning to stick the hearts on the larger block of ice with a little bit of water and put the ice sculpture back into the freezer but E had no patience for such plans. So we worked together to stick the hearts on but skipped the extra freezer time – and it wasn’t really needed, either.
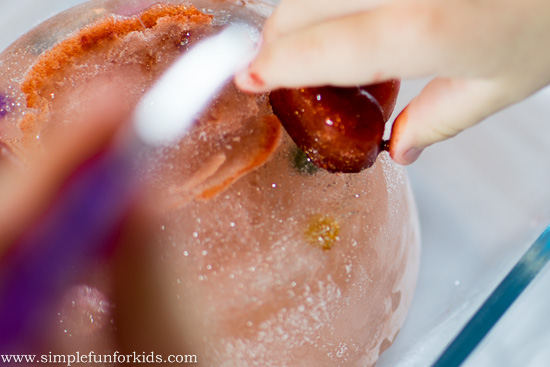
E only did a few because the ice hearts were too cold on her fingers, and I finished the rest of the hearts.
Now, E went to work with the eye dropper with room temperature water
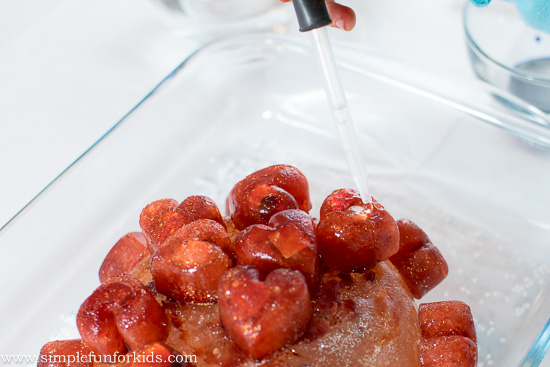
and the salt.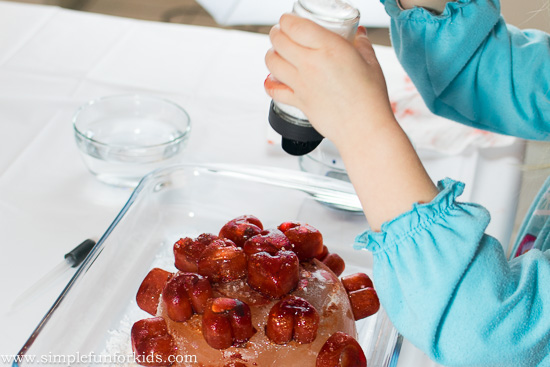
She also tried to get to the gems with her fingers and was a bit confused about why that didn’t work.
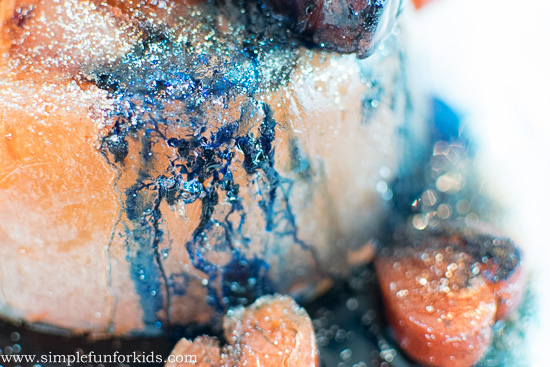
She tried the blue liquid watercolors I’d provided but it was a bit underwhelming. My visions of the red and blue mixing to a beautiful purple didn’t come true 😉
The salt also seemed to do disappointingly little – until we noticed how the blue watercolors had made their way down the side of the ice sculpture, following the path of the salt. So beautiful!
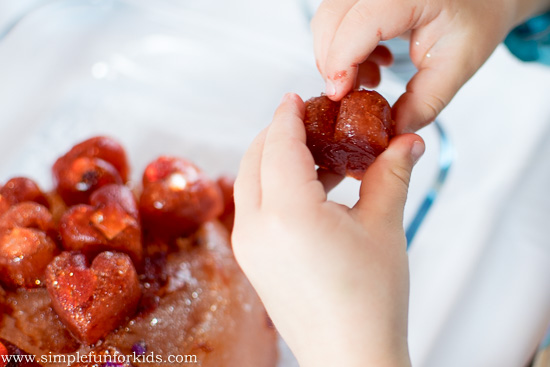
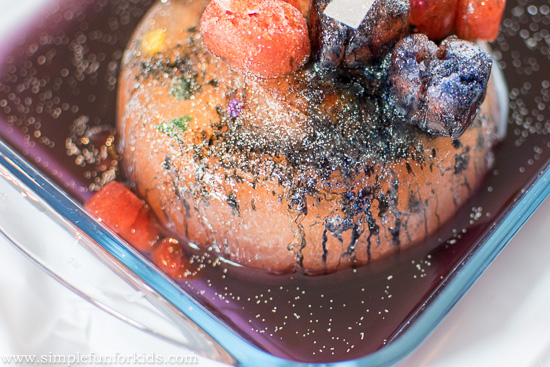
I shouldn’t have worried about how long it takes the hearts to melt – they would have lasted well long enough on their own. In fact, we still had most of the ice sculpture pretty much intact, and only two gems excavated, when E started losing interest.
I put the rest of the ice sculpture back into the freezer to save it for another day, then went to pour water into the baking dish to rinse it – and suddenly, the baking dish was filled with beautiful purple glittery water! My color mixing vision had only needed more water 🙂
It piqued E’s interest as well, and we decided to put the ice sculpture back into the baking dish.
This way, it held E’s attention for a while longer, and she was able to excavate several more gems.
Even when E had finally had enough, we still had plenty of ice left to have fun with another day.
Have you played with ice excavation? Have you tried a Valentine’s treasure hunt? Leave a comment and tell me all about it! Feel free to leave a link if you’ve written about it.
If you like this post, click here to subscribe to my newsletter and receive an email once a week when new posts are published, or to my RSS feed.
Also make sure to follow me on Pinterest to stay up to date with all we do, and for lots of great ideas from others!
If you prefer Facebook, I’d love to connect with you there: Like and drop me a line on my Facebook page, where I share my own posts and those of others every day!