

Glue Star Suncatchers
A few months ago, we were looking for a quick, fun craft to do, and came up with glue star suncatchers decorated with glitter and beads.
I first saw the technique in Where Imagination Grows’ post on Heart Suncatchers. They didn’t use glitter – but everything is better with glitter, isn’t it? 😉 If you don’t agree, you can most certainly just skip the glitter.
(E was 3 years and 3 months old.)
This post contains affiliate links for your convenience.
To make Glue Star Suncatchers, you’ll need
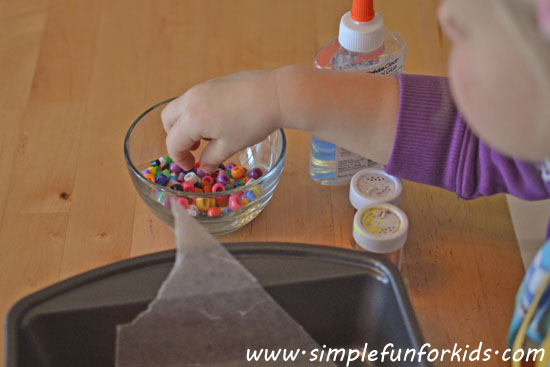
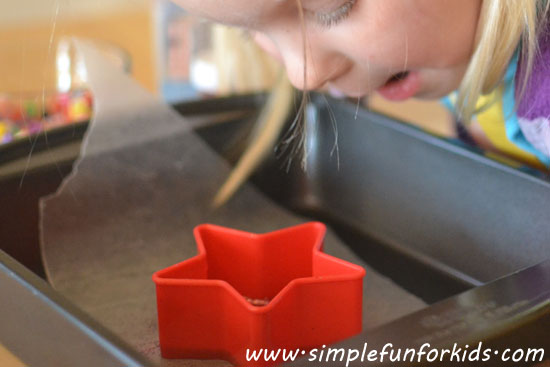
- Tray, cookie sheet or similar to work on. {See notes below for more info.}
- Cookie cutters.
- Wax paper.
- Clear Elmer’s Glue. {White glue should work as well, it was used in the original post.}
- Pony beads.
- Glitter (optional).
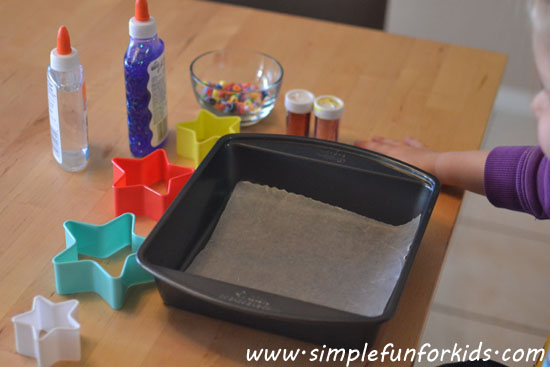
We started by gathering all the materials we needed. I chose an 8×8 cake pan to work in and placed some wax paper at the bottom.
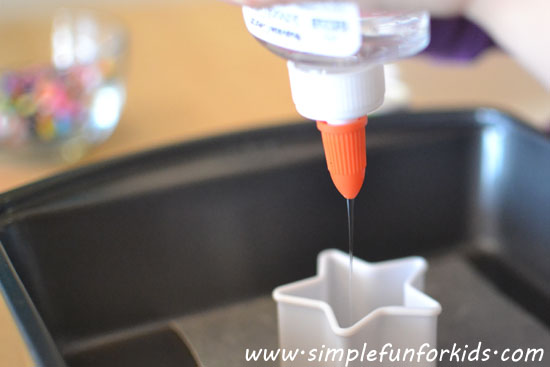
E got right to work with the clear glue, filling the bottom of the cookie cutter.
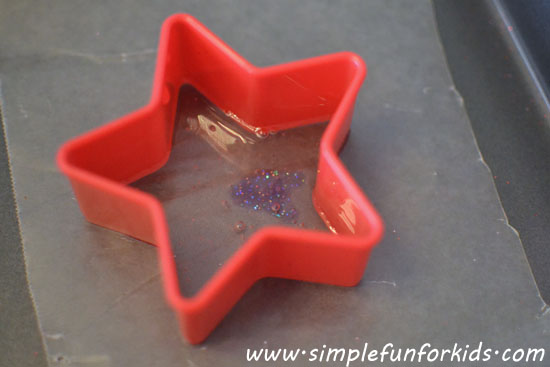
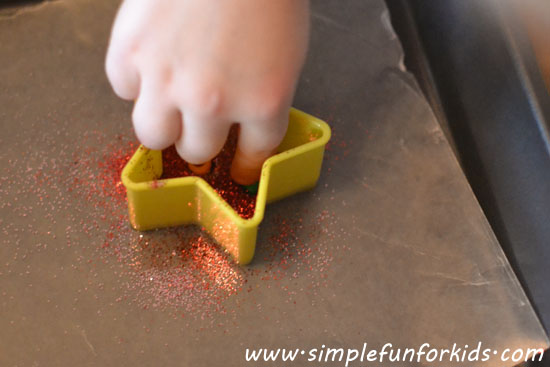
We tried out some glitter glue but it was really hard to squeeze, so the base of one of our stars looked like this before decorations were added:
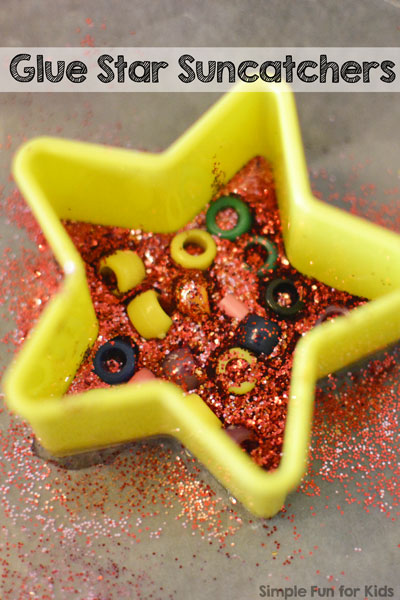
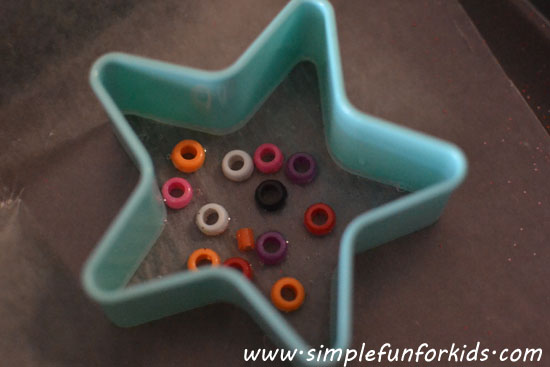
It didn’t matter, as E made sure to use LOTS of decorations 😉
She used as much glitter as she wanted to before carefully picking out beads
and placing them in the glue.
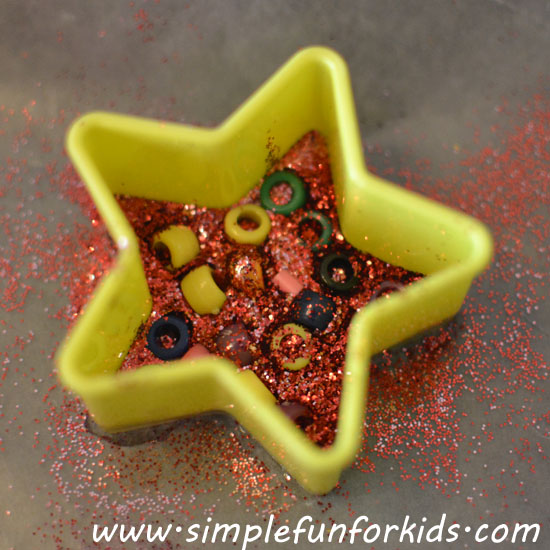
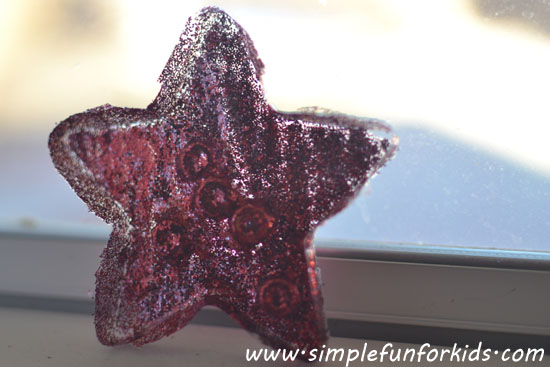
And then, she usually added MORE glitter on top 😉
She loved it! {And when she saw the photos in this half-written post on my screen, she immediately said that she wanted to do it again 🙂 }
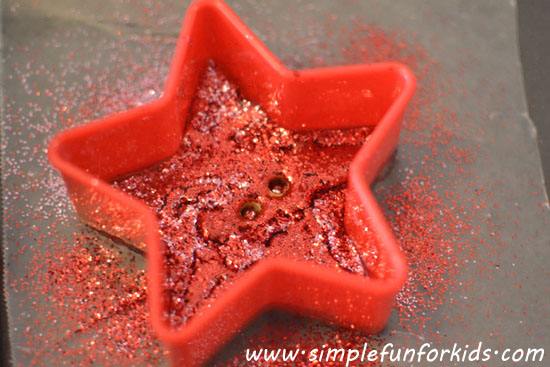
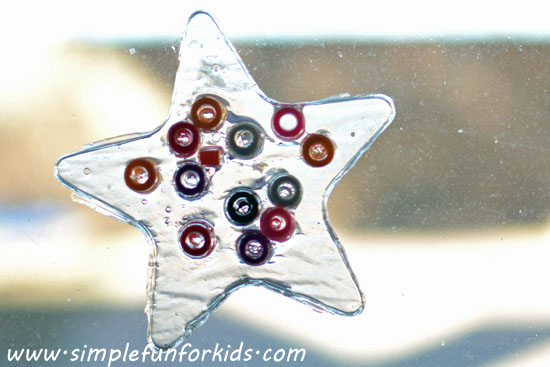
At my suggestion, she did one glue star suncatcher without glitter, just to see how it turned out.
I wasn’t entirely confident that all the glue star suncatchers were going to work out, it looked like some had too much glue and/or glitter, and the beads almost disappeared in the mix.
However, they all turned out fine, as the glue shrinks quite a bit during the drying process.
In the pictures of the finished products, you can see where the glue clung to the edges of the cookie cutters but shrunk in the middle:
Additional notes:
- While my 8×8 cake pan did a really good job of containing the glue, glitter, and beads, a bigger size would’ve been better. I had to move the cookie cutters with a spatula underneath the wax paper each time one of the stars was finished to make room for the next one, and while it worked okay-ish, some of the glue leaked out every time. We did have plenty of glue, but it could’ve been avoided if we’d had a cookie sheet or tray that fit all the cookie cutters at once.
- I didn’t realize it at the time but we used particularly sturdy cookie cutters, so we didn’t have any issues with leaking glue until I moved the cookie cutters. Please read the comments for some ideas that might help if your cookie cutters leak.
- It takes a while for the glue to dry completely, depending on how much you use. Ours were dry by the end of the next day.
- The dry glue sticks to glass but depending on how many beads you use, the glue star suncatchers may get too heavy. Alternatively, you could punch a hole at the top of your suncatchers and hang them up that way.
Have you made glue suncatchers? Do you like glitter, or do you fear the clean-up? Leave a comment!
Click here to subscribe to my newsletter and receive an email twice a week with news from our house and links to all new posts! If you prefer daily updates, you have the option of subscribing to my RSS feed or my printables RSS feed on the same page.
Join me in my Facebook group where we discuss simple play ideas for young kids every day!

Yay! I love the glitter twist! 🙂
Thank you for the inspiration, Lisette, so glad you like it 🙂
What a great idea! I’m going to try that today with my kiddos. I wonder how it would work using several little glue bottles with different-colored food dye mixed in. Swirles of color?
Ooh, colored glue sounds awesome, would love to hear how it works out for you!
Love that idea!
This reminds me of something I did in elementary school. We used a pipe cleaner, it was in a shape then put glue sand beads in it. But we used sequins, seed beads and glitter. Ah the memories. Nowbi want to make one. Lol
How fun that this craft made you all nostalgic 🙂 Go make one!
fun!!! If we try this I am certainly taking it outdoors otherwise the kitchen will be covered in glitter!!
Taking it outside is always a good idea if you’re worried about spills 🙂
Have you tried it without the glue? The beads should melt 🙂
I’m gonna try you way over the weekend. Thanks x
We tried it a while back but had some trouble getting the suncatchers to come out of the cookie cutters… We really should try again some time soon! Thanks for the reminder!
If you melt the beads you have to pop the shape out quickly when you remove them from the oven. I use an icing rose nail to put a hole in them at that time too. You have to be really really quick!
I tried the regular school glue and it didn’t work so well, so I tried the clear kind and the glue just keeps leaking out from the cookie cutter… There’s still some there, but the little jewels aren’t covered anymore… Any advice? Thanks, and I do love the idea!
Hi Angie, I’m sorry that you had problems with this craft! Your cookie cutters need to be reasonably straight, and the surface you’re working on needs to be pretty level, as well. Unfortunately, cookie cutters tend to warp easily for me, and my cheap cookie sheets have seen better days, as well. If you have a table, kitchen counter or similar where you can make the suncatchers and just let them dry in the same spot (skipping the cookie sheet), it really helps to keep the glue where it belongs, too. You could try to use a little more glue than you think you need – my daughter used a lot more than I would have, and it shrunk quite a bit when it dried. Good luck, and let me know how it works for you!
I had the same luck with the glue coming from under the cookie cutters. I took a low temp glue gun and put a small bead of hot glue around the cookie cutter and the glue didn’t leak then. But I did have trouble getting the clear glue to dry completely. When I thought they were dry, I tried to pull the wax paper from the bottom and the glue was still very we inside and the wax paper just tore. Any advice with this??? Please help!
Jennifer, good idea with the glue gun! I’ve seen a suggestion of using contact paper under the cookie cutter recently, it might be worth a try as well.
As for the time it takes the glue to dry, it does take a while. I left ours alone for 2.5 days, and they were completely dry by then. Keep in mind that we had issues with leaking when I moved the cookie cutters to a spot where they could dry undisturbed, so we didn’t have THAT MUCH glue in there. If you do have a lot of glue that needs to dry, you may want to wait even longer.
When you pull off the wax paper, do it slowly, so you can stick it back down if you do happen to discover a wet area.
I hope any of this helps!
#epicfail
My son was so excited to do this project and it just went in the trash. The glue leaked everywhere, the ones that didn’t leak, wouldn’t come off the paper or out of the cookie cutter and the glue never did dry.
We left them sit for days and never dried. Sorry, not a favorite.
Amy
Amy, I’m so sorry that this didn’t work out for you – it’s so disappointing, especially when the kids get upset 🙁 The more I think about it, the more I realize that we used particularly sturdy cookie cutters – quite by accident, they were the only star shaped ones we had.
Another idea would be to push down on the cookie cutter a bit when you start putting in the glue, so as the glue starts setting, it plugs up small leaks.
I’m unsure about the issue with glue not drying even after DAYS – which type of glue did you use?
I will be doing this project with my girls tomorrow! As far as the glue drying, I did an Elmer’s glue snowman project with my 3 year old last year and to speed up drying, we stuck it in the refrigerator (per the instructions). I don’t know if that will help others with their drying issues but it’s worth a try!
That’s a great idea, Brandy, thank you! We tried to make glue snowmen and ghosts recently, and had issues with runny glue that got worse the longer they were sitting out. I’ll make sure to try the fridge next time!
My first attempt at this project was an epic failure because the glue leaked out from under the cookie cutters. After several more experimental attempts I have two tips to prevent leakage. I found that the best cookie cutters were the cheap plastic type with the lip on one side. Normally, you would hold the lip and the non-lipped side would cut your cookie dough. For this project, the wide side (with the lip) will be placed on the bottom, against the wax paper. The second tip is to liberally coat the bottom (side with the lip) with a layer of petroleum jelly (Vaseline). When you place the wide coated side of the cookie cutter on the waxed paper, wiggle it down a little to make a seal with the wax paper. No leakage!
What a great technique! Thank you, Grammy!