

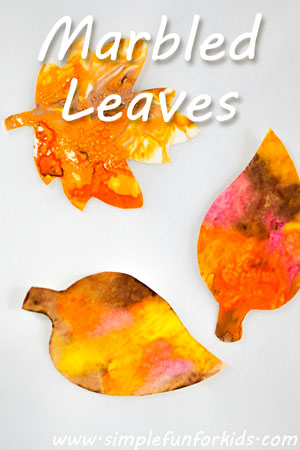
Marbled Leaves
If you’ve been reading my posts for a while, you know that marbling with shaving cream is one of our favorite art techniques. Here are a few examples: Marbled Hearts {our first attempt at this technique}, Marbled Pumpkins, and Marbled Christmas Trees.
This time around, after we hadn’t revisited this technique since Christmas, I wanted to change things up a bit with a greater focus on the theme. I didn’t just want to marble a whole sheet of paper {or craft foam like we did with Marbled Eggs}, then cut it down to whatever shape we wanted as we previously had. Check out what we did for this year’s Marbled Leaves!
(E was 3 years and 11 months old.)
This post contains affiliate links for your convenience.
To create your own Marbled Leaves, you’ll need:
- Shaving cream.
- Leaf cookie cutters. {For this project, we used cheap plastic cookie cutters from the dollar store but we also have this set – it’s called Halloween Cookie Cutter Set but has several fall designs and leaves as well.}
- Liquid watercolors. {Tempera paint works as well, and we’ve used it with this technique before. However, the combination of liquid watercolors and watercolor paper that we used this time resulted in a unique effect in the final results.}
- Heavy paper or craft foam {we used watercolor paper}.
- Eye dropper.
- Item to mix the paint into the shaving cream. We used a chopstick but you could simply use a paintbrush or any similar items you have on hand.
- Tray, baking dish or similar to work in.
- Popsicle stick, piece of cardboard or similar to wipe the shaving cream off.
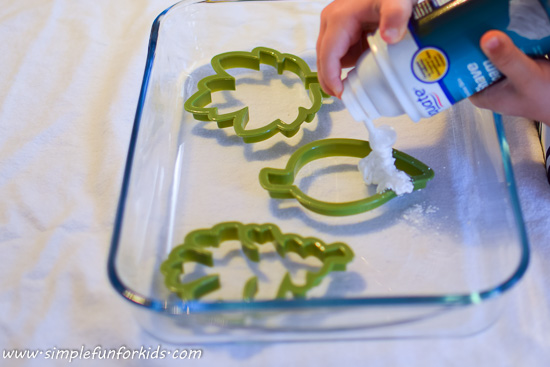
In order to focus more on our leaves theme, I wanted to see if we could use cookie cutters to make leaf-shaped prints.
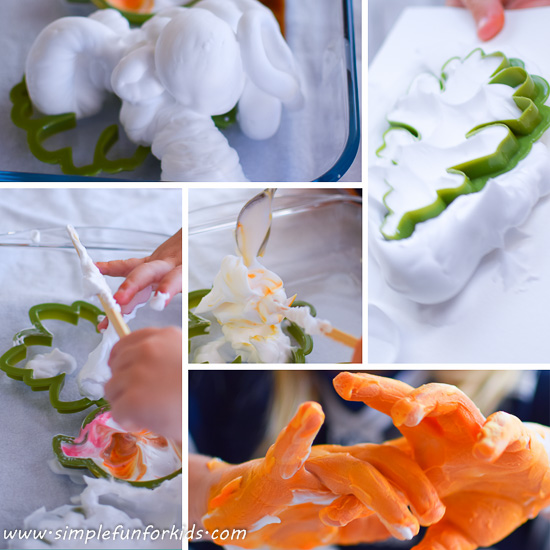
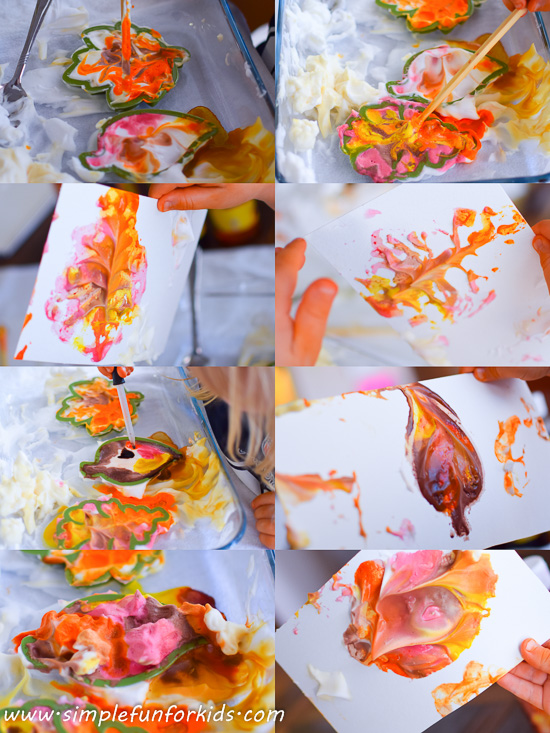
E started by arranging the cookie cutters in our baking dish, then added shaving cream to one of the cookie cutters.
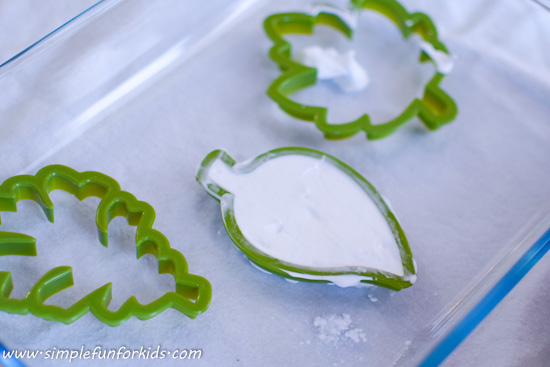
I smoothed out the top with a chopstick to make a leaf-shaped canvas for E to decorate with liquid watercolors. {E wasn’t really able to smooth it out herself, as the sides of the baking dish were a bit too high and didn’t leave much room to maneuver with a chopstick held horizontally. You may want to choose something with lower sides or a larger surface area.}
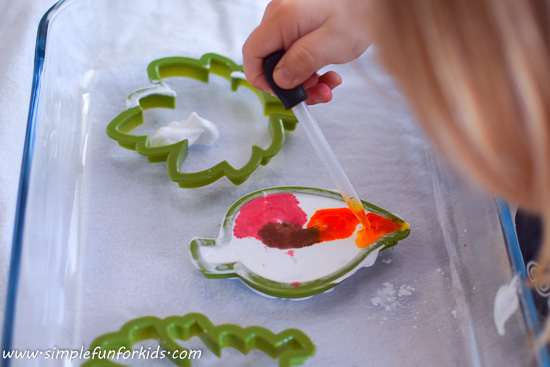
As usual, she then used the chopstick to swirl the paint around for the marbled effect.
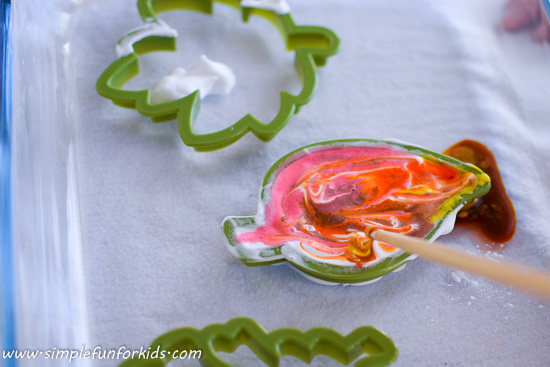
When she made the print, I was extremely happy with how well the leaf shape transferred to the paper!
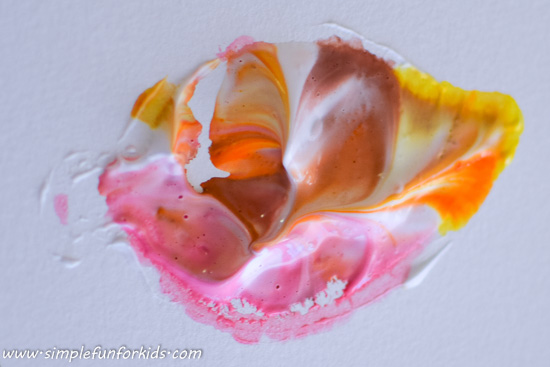
This is what it looked like after we’d let it sit for a bit, then scraped the shaving cream off. She’d used quite a large amount of paint, and in combination with the watercolor paper we’d used for the first time, the effect was a bit different than in previous marbled projects but I really liked it.
E clearly wasn’t nearly as impressed with the leaf shape as I was, and she spent some time just playing with the shaving cream.
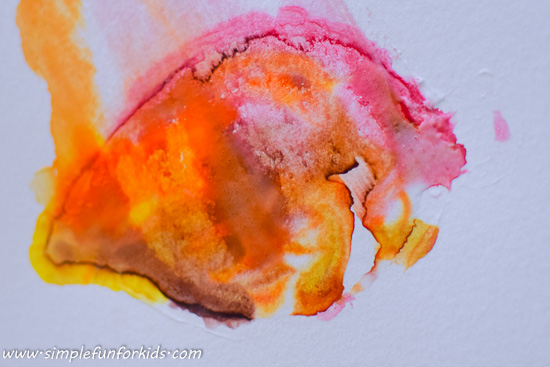
Afterwards, she did make several more marbled leaves on her own with varying levels of success.
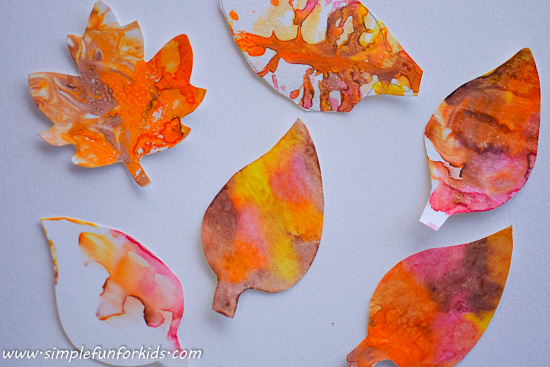
My initial plan of making leaf-shaped prints really only worked with the simplest leaf cookie cutter, the ones that had more corners didn’t produce a sharp outline.
That didn’t keep us from turning ALL prints into marbled leaves, of course – I just placed the cookie cutter back on top of those prints that didn’t have an obvious outline and traced it with a pencil. Finally, E and I cut along the lines, and we ended up with beautiful leaves. {Note one that E cut out at the top middle of the picture below – I was pretty impressed with how close she was, and I didn’t correct her.}
This is what the baking dish looked like when we were done:
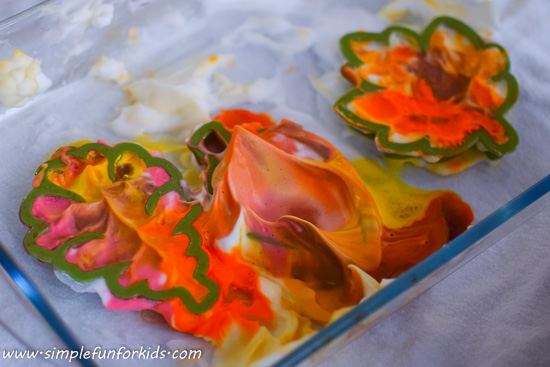
Do you think we were able to bear just washing those beautiful colors away? No way! We used what was left for a new baking soda and vinegar activity!
Have you tried shaving cream marbling? What’s your favorite marbled decoration? Leave a comment below!
If you like this post, click here to subscribe to my newsletter and receive an email once a week when new posts are published, or to my RSS feed.
Also make sure to follow me on Pinterest to stay up to date with all we do, and for lots of great ideas from others!
If you prefer Facebook, I’d love to connect with you there: Like and drop me a line on my Facebook page, where I share my own posts and those of others every day!
One Comment